Design Backend Data Models with the Diagram Builder
Use the Diagram Builder to define the data model behind your backend: the objects you store, the values they contain, and the relationships between them.
Open a workspace and select Diagram in the navbar. If the canvas is empty, start with the main entity your product needs, then add supporting entities, enums, attributes, and relationships.
This guide is organized around the visual examples below:
- The interactive demo shows the complete node-creation flow: entity, enum, input plate, and Sketch Board.
- The attribute figures show adding an attribute, configuring it, and adding validation from the same inspector.
- The relationship video and figure show drawing an edge and tuning its relationship settings.
Diagram Nodes
Diagram nodes are the objects placed on the canvas. An entity becomes a stored data model, an enum defines a controlled list of values, and a Sketch Board lets you draw an idea before asking AI to turn it into a structured node.
Use the left sidebar to find existing entities and enums. Use the Object Nodes section in the right sidebar when you want to drag a new node to an exact canvas position.
Use the interactive demo below as the visual reference for this whole section. It combines the entity, enum, input-plate, and Sketch Board steps into one diagram-building flow.
Add an Entity
An entity represents something the backend stores, such as a user, product, order, appointment, or message.
- In the Diagram view, select Add Entity beside Entities in the left sidebar. You can also drag Entity from Object Nodes in the right sidebar onto the canvas.
- Rename the new entity with a singular, descriptive name such as
ProductorOrderItem. - Add the fields that belong to the entity. Give every stored entity a stable primary key.
- Select the entity to review its attributes in the right configuration sidebar.
Result: the entity appears on the canvas and in the Entities list. It is now available as a type in attributes, request fields, and logic nodes.
Entity titles are normalized automatically to PascalCase. For example, typing order item, order_item, or order-item becomes OrderItem, which keeps generated model names consistent.
Use Show more under Object Nodes to choose a predefined entity such as User, Address, File, or Student when it is close to the model you need.
Add an Enum
An enum limits a field to a known set of values. Typical examples include Role, Status, Priority, and Country.
- Select Add Enum beside Enums in the left sidebar, or drag Enums from Object Nodes onto the canvas.
- Rename the enum with a singular, descriptive name.
- Add one value at a time. Avora formats enum values consistently in uppercase.
- Select an entity attribute and choose the enum as its type.
Result: the enum becomes a reusable data type. Fields that use it accept only the values defined in the enum.
Create role enums before configuring request access. The Request Builder reads the enum values when you choose allowed roles.
Add From an Input Plate
The input plate is the small text field at the bottom of an entity, enum, request, or action node. It is the fastest way to add content without leaving the canvas.
For an entity:
- Select the entity and focus # add new attribute.
- Enter
name: type, for exampleprice: float. If you omit the type, Avora usesstring. - Choose a suggested common field with the arrow keys and press Enter, or press Enter to use your custom value.
- Press Tab instead when you want AI to complete or update the selected entity from your instruction.
The entity node is optimized for fast keyboard entry. Attribute names are normalized to camelCase, so shipping address, shipping_address, and shipping-address become shippingAddress. After you add an attribute with Enter, Avora focuses the new row's type selector so you can set the type immediately.
While editing an attribute row, use ArrowRight at the end of the attribute name to jump into the type selector. Use ArrowLeft at the beginning of the type selector to return to the name. Use ArrowUp and ArrowDown to move between editable rows, unless a suggestion menu is open; when suggestions are open, those keys move through the suggestions instead.
Type the first letters of a type to move the selector toward the matching option, then press Enter to accept it. Type [ before selecting or typing a type when the field should be a list; Avora completes the brackets and stores the type as a list value such as [string]. After type selection closes, focus returns to # add new attribute so you can keep pressing Enter to add the next field.
For an enum, enter a value in # add new value and press Enter. Press Tab to ask AI to suggest a relevant value set.
Review AI-generated fields before continuing. Confirm each name, type, flag, default value, and validation rather than treating the generated structure as final.
Add From a Sketch
Use a Sketch Board when the shape of a model is easier to draw than describe.
- Drag Sketch Board from Object Nodes in the right sidebar onto the canvas.
- Resize the board if needed, then draw the entity or enum name and its important fields or values.
- Select the Sketch Board and choose Generate Code from Drawing from its action toolbar.
- Wait while the configured vision model analyzes the drawing and converts the board into an entity or enum.
- Review the generated node, correct field types, and configure its key and validation rules.
Sketch analysis requires an AI model with image-analysis support. If the action is unavailable or fails, open AI settings and select a compatible model for Analyse from Sketch.
Entity Attributes
Attributes are the named, typed values stored on an entity. They become model fields and influence request inputs, database columns, validation, and generated code.
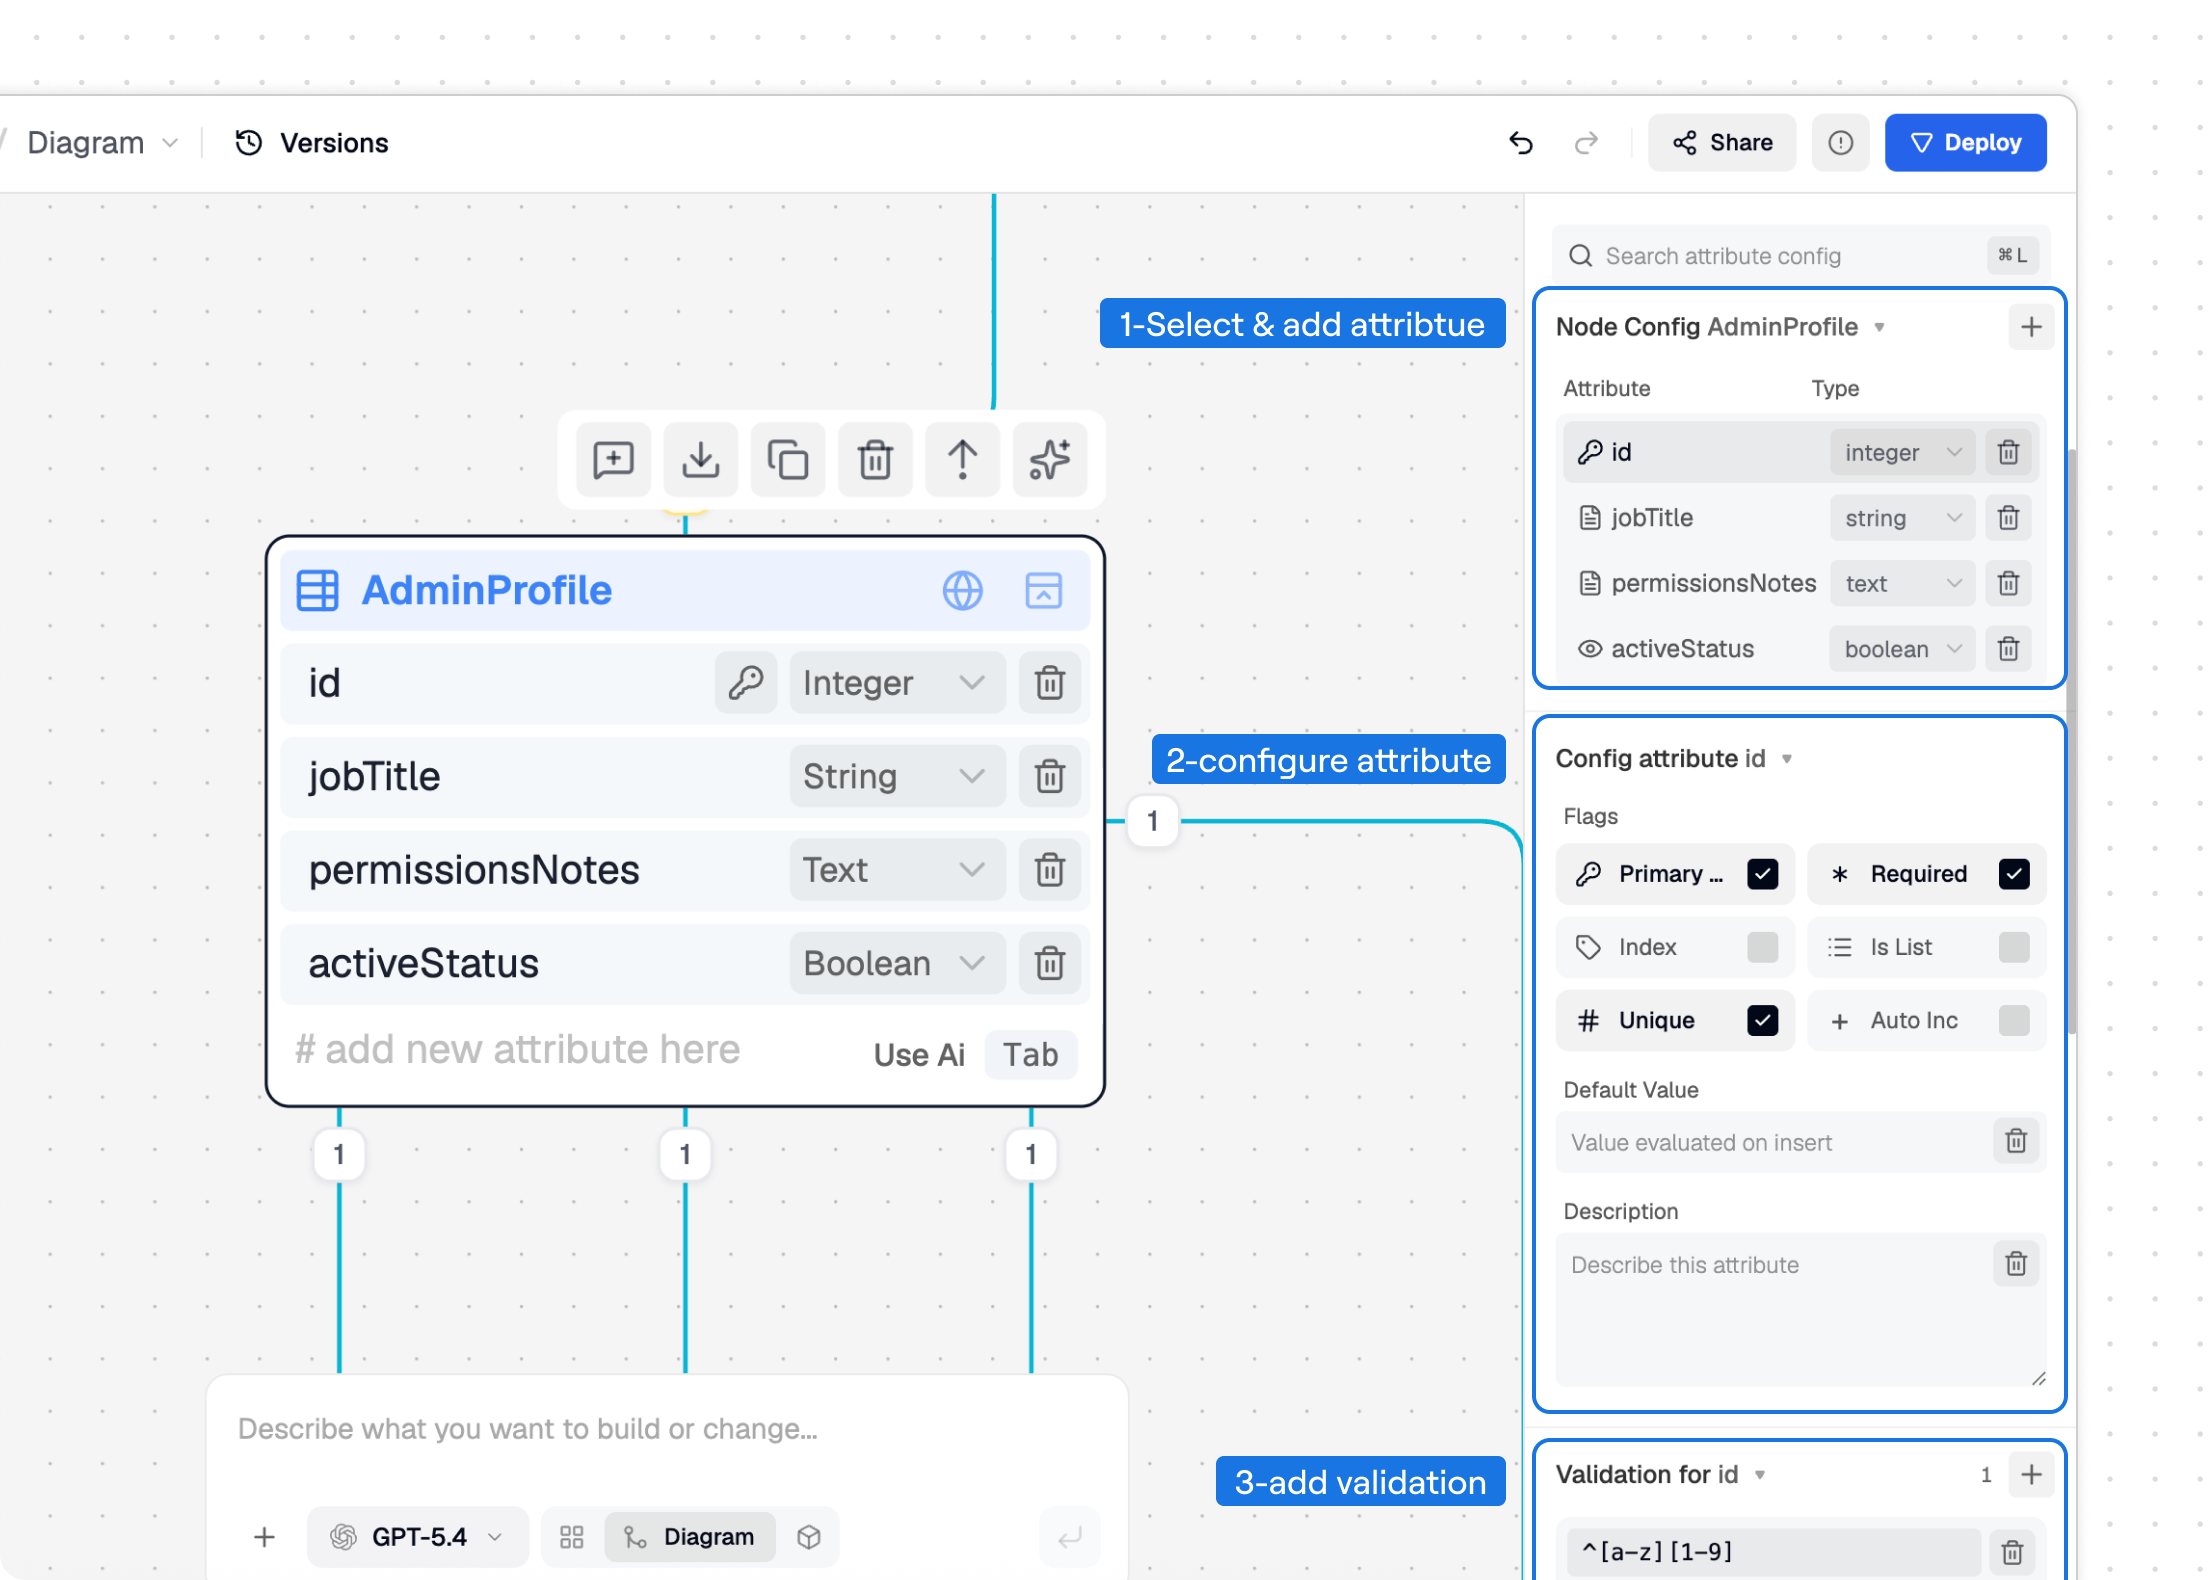
Use the two figures in this section as one workflow. The first figure shows adding a field from the entity input plate. The second figure shows the inspector split into three parts: 1 select or add an attribute, 2 configure the selected attribute, and 3 add validation rules.
Add an Attribute
Add attributes from either the node or its inspector:
- Select an entity.
- Enter a field in the node input plate, or select Add attribute in the right sidebar.
- Give the field a clear camel-case name such as
createdAtorshippingAddress. - Choose a built-in type, an enum, or another entity type.
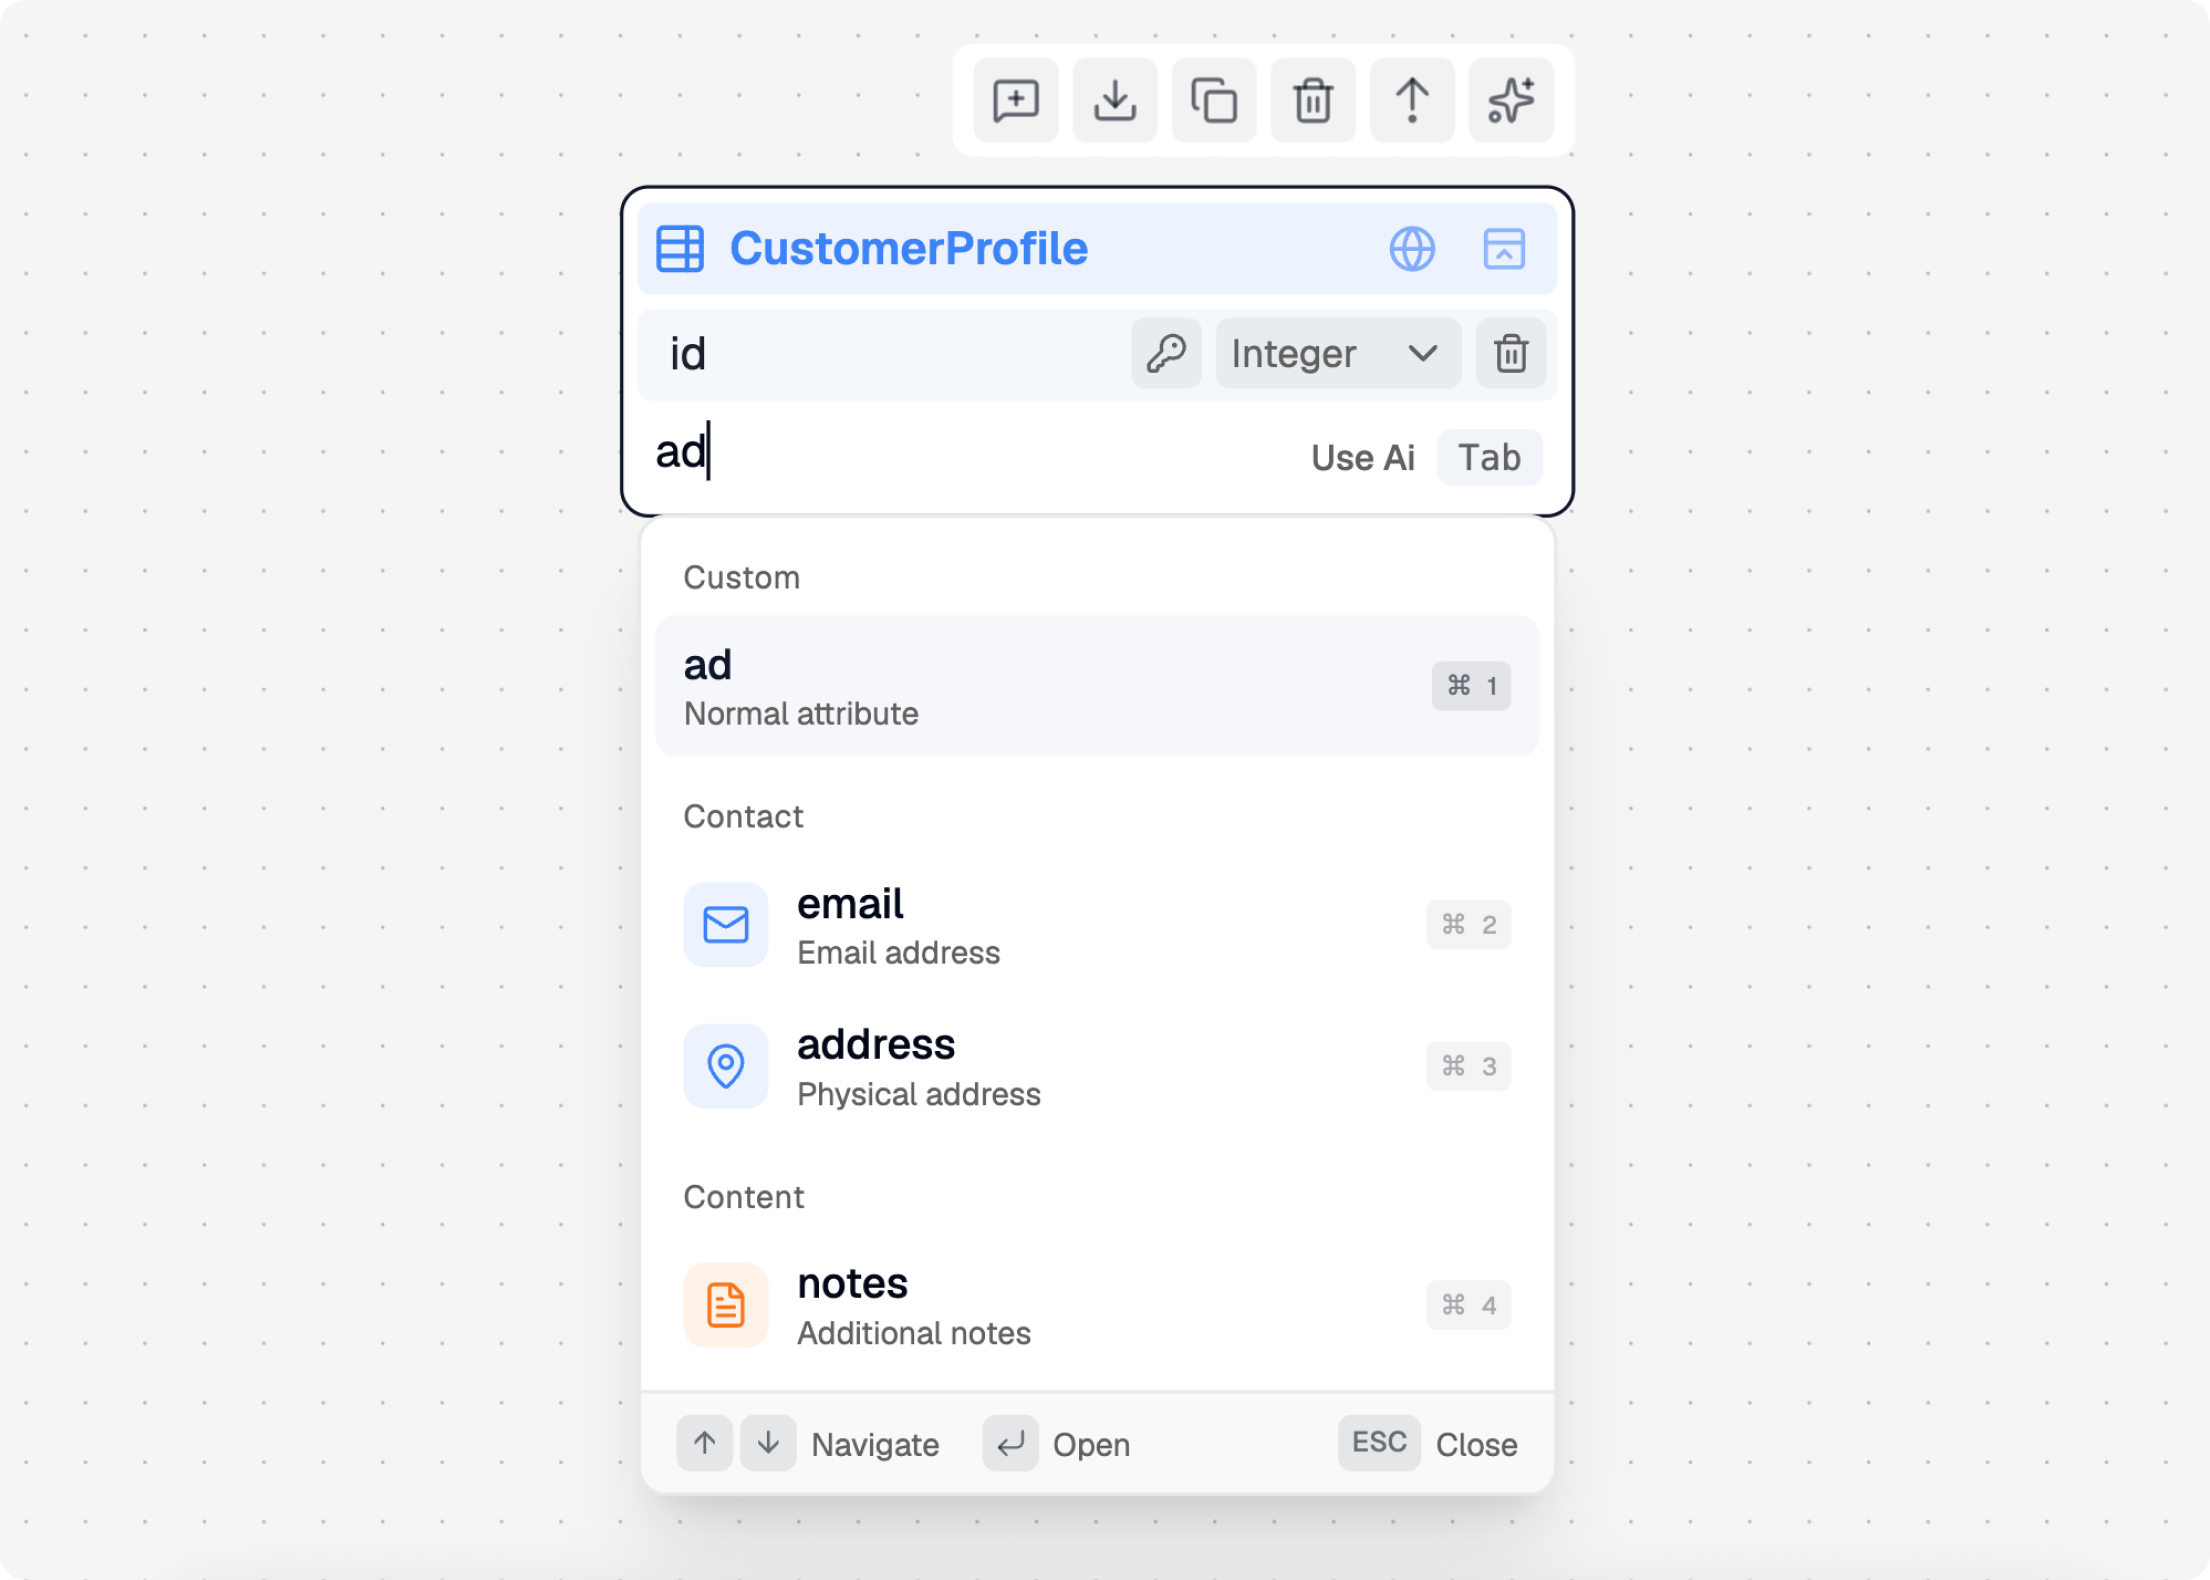
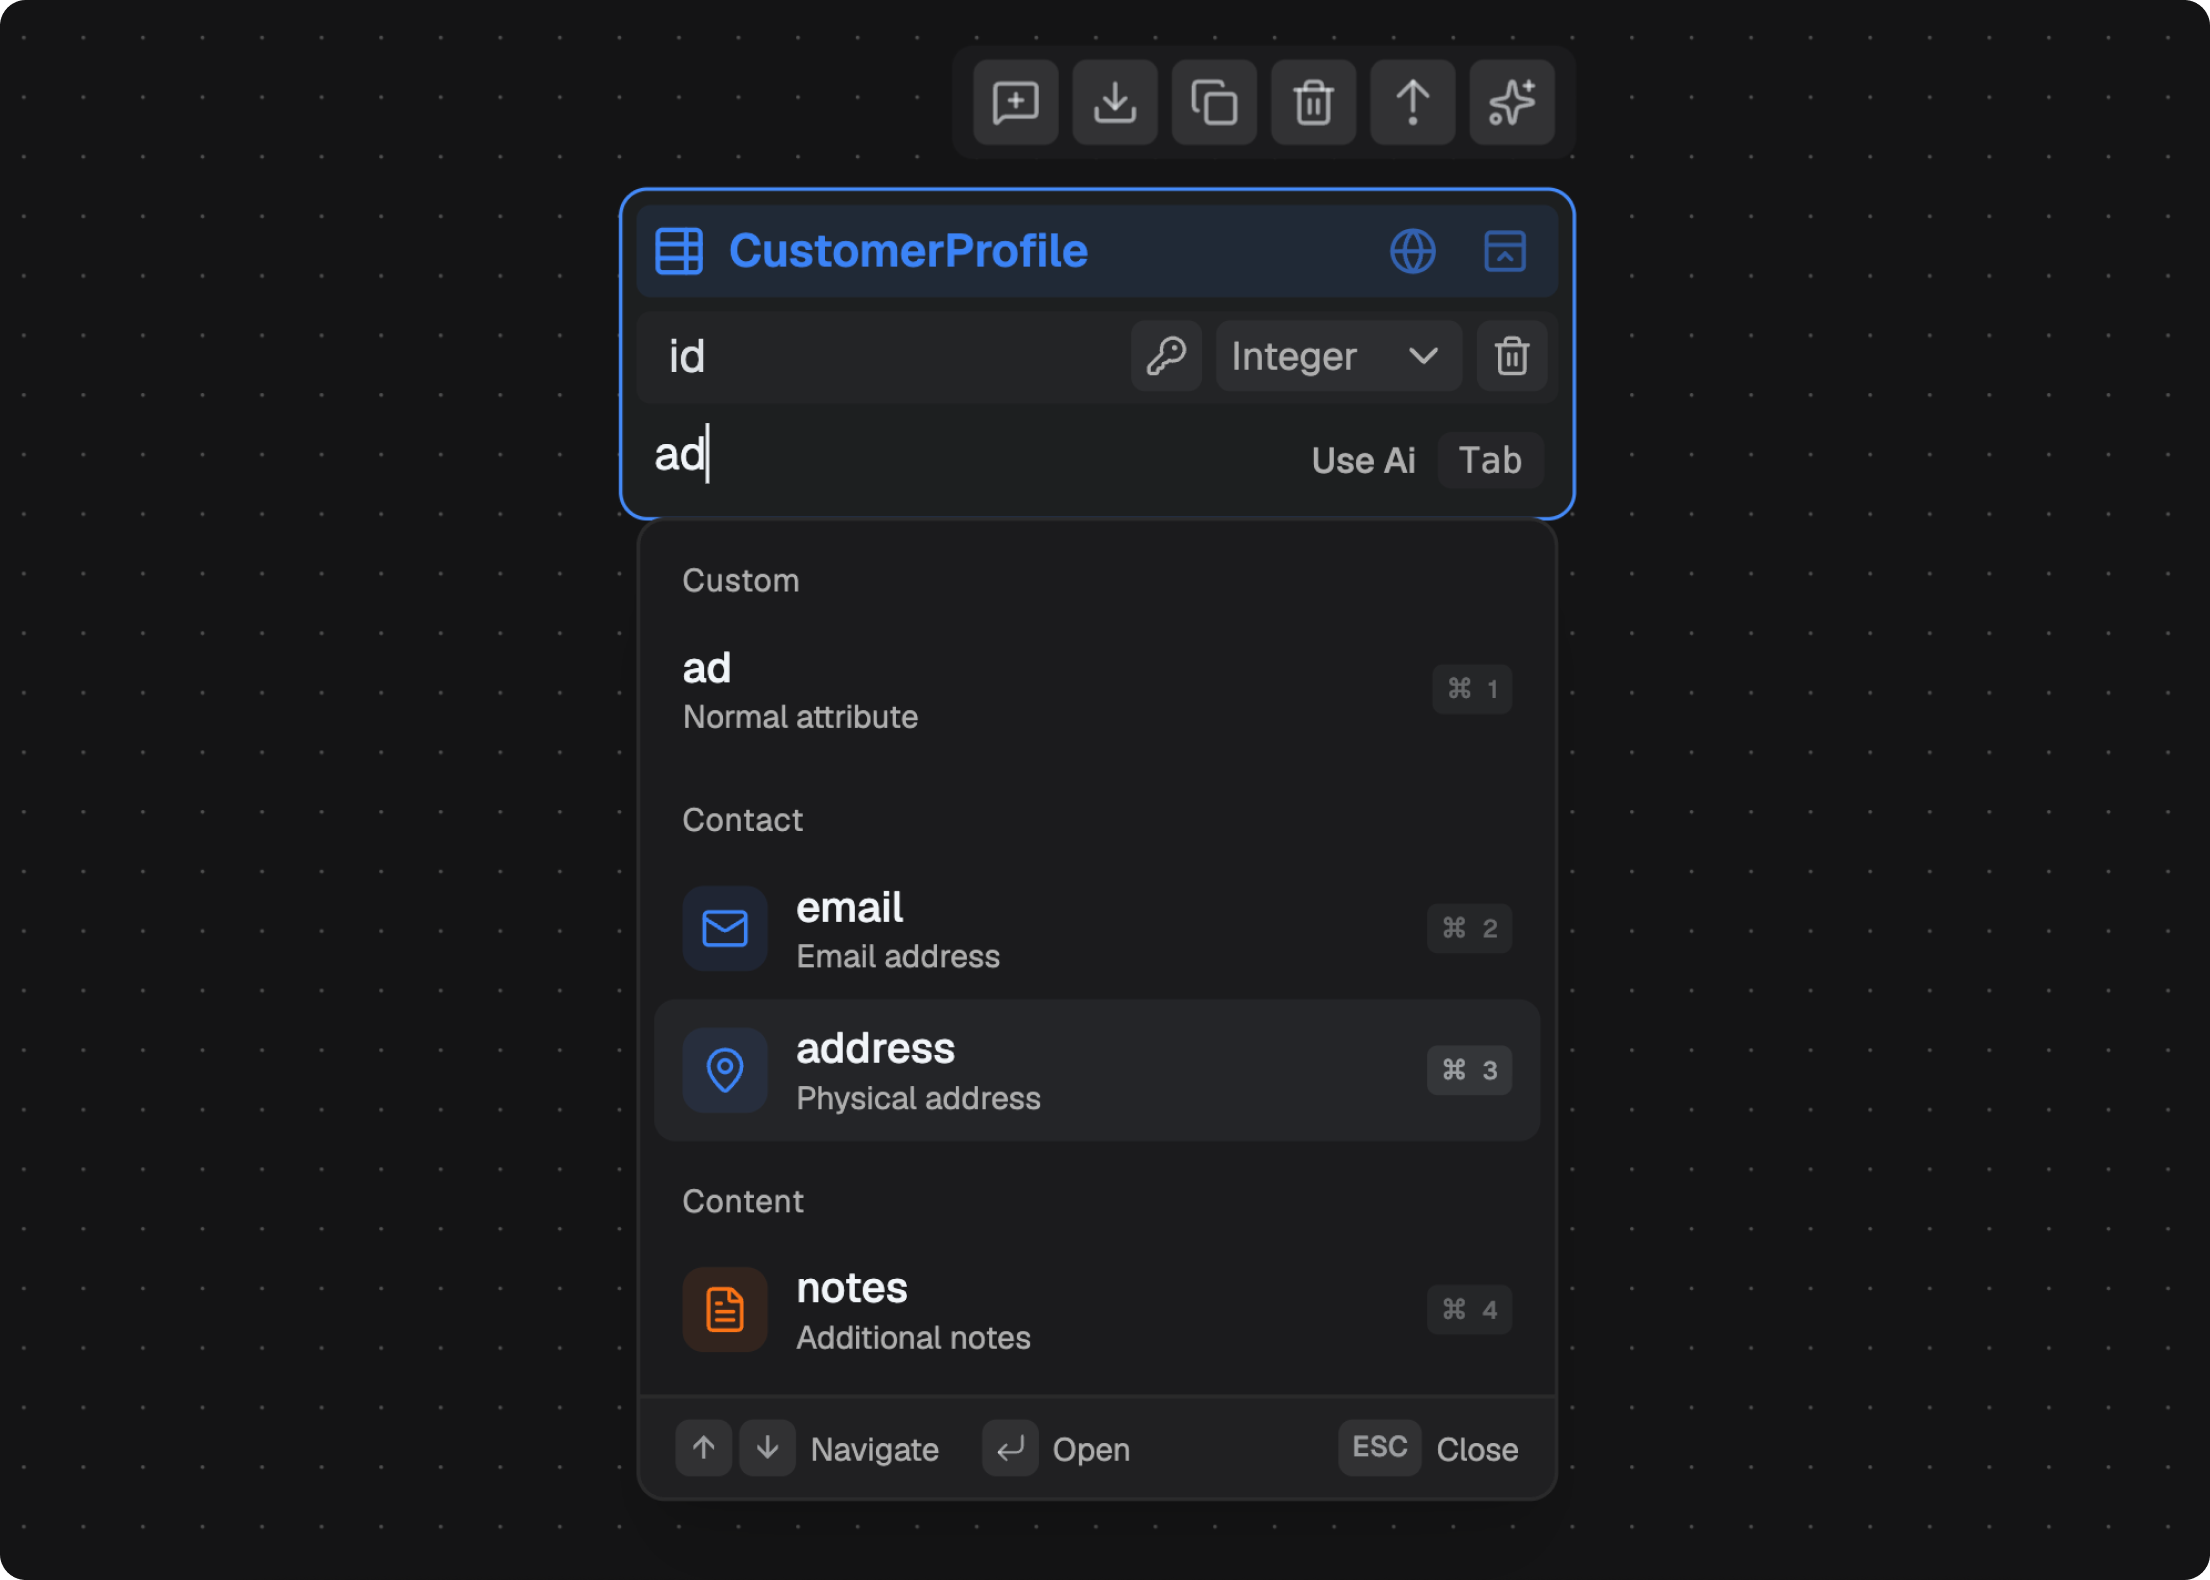
Use a list type only when one record genuinely stores multiple values. Relationships are usually a clearer choice when the values belong to another stored entity.
Configure an Attribute
Select an attribute row to open Config attribute in the right sidebar. Configure only the flags that match the data rule.
| Setting | Use it when |
|---|---|
| Primary Key | The field uniquely identifies every record. A primary key is also required and unique. |
| Required | A record must provide the field; turning this off allows a null value. |
| Unique | No two records may share the same value, such as an email address or external reference. |
| Index | The application frequently searches or filters by the field. |
| Is List | One field contains multiple values of the selected type. |
| Auto Inc | An integer identifier should increase automatically for each new record. |
| Default Value | The backend should use a value when the request does not provide one. |
| Description | Teammates and generated documentation need context that the name alone does not provide. |
You can rename, change the type, delete, or drag attributes into a clearer order from the right sidebar. An enum attribute uses one of the enum values as its default. Other types accept a value evaluated when a record is inserted.
Avoid enabling both Primary Key and Index manually. A primary key already has indexed lookup behavior, and Avora keeps the settings consistent for you.
Add Validation
Validation rejects values that do not meet a field rule before they reach application logic.
In the attribute configuration figure above, validation is the third highlighted area at the bottom of the right sidebar. Add validation after the attribute name, type, and flags are correct.
- Select the attribute.
- In Validation for attribute, select Add validation.
- Enter a regular-expression pattern, such as
^[a-z]+$for lowercase letters only. - Add a clear error message that tells the API consumer how to correct the value.
- Add another validation only when it checks a distinct rule.
Validation patterns are not available for enum attributes because the enum values already define the accepted set. Test patterns with valid, invalid, empty, and boundary values before generating code.
Relationships
Relationships describe how two entities are connected. They determine navigation between records and can affect foreign keys, nested request shapes, deletion behavior, and generated database structure. The diagram keeps those links as edges instead of repeating generated foreign-key fields in the attribute list.
Add a Relationship
- Select the source entity.
- Choose Connect from the node action toolbar.
- Select the target entity, or drag from a visible connection handle to the target.
- Select the new edge to open its relationship controls.
- Read the relationship information tooltip to confirm that the sentence matches your intent.
Result: an edge joins the two entity nodes. The relationship remains editable without recreating either entity.
Configure a Relationship
Use the edge toolbar to configure the relationship:
| Control | Meaning |
|---|---|
| Type | Association, aggregation, composition, inheritance, realization, or dependency. |
| Multiplicity | The number of records allowed on each side, including 1:1, 1:*, *:1, *:*, 0:1, and 0:*. |
| Direction | For associations, whether navigation is forward, backward, or bidirectional. |
| FK owner | For supported relationships, which entity stores the foreign key; Auto selects the conventional owner. |
| Swap | Reverses the source and target without drawing a new edge. |
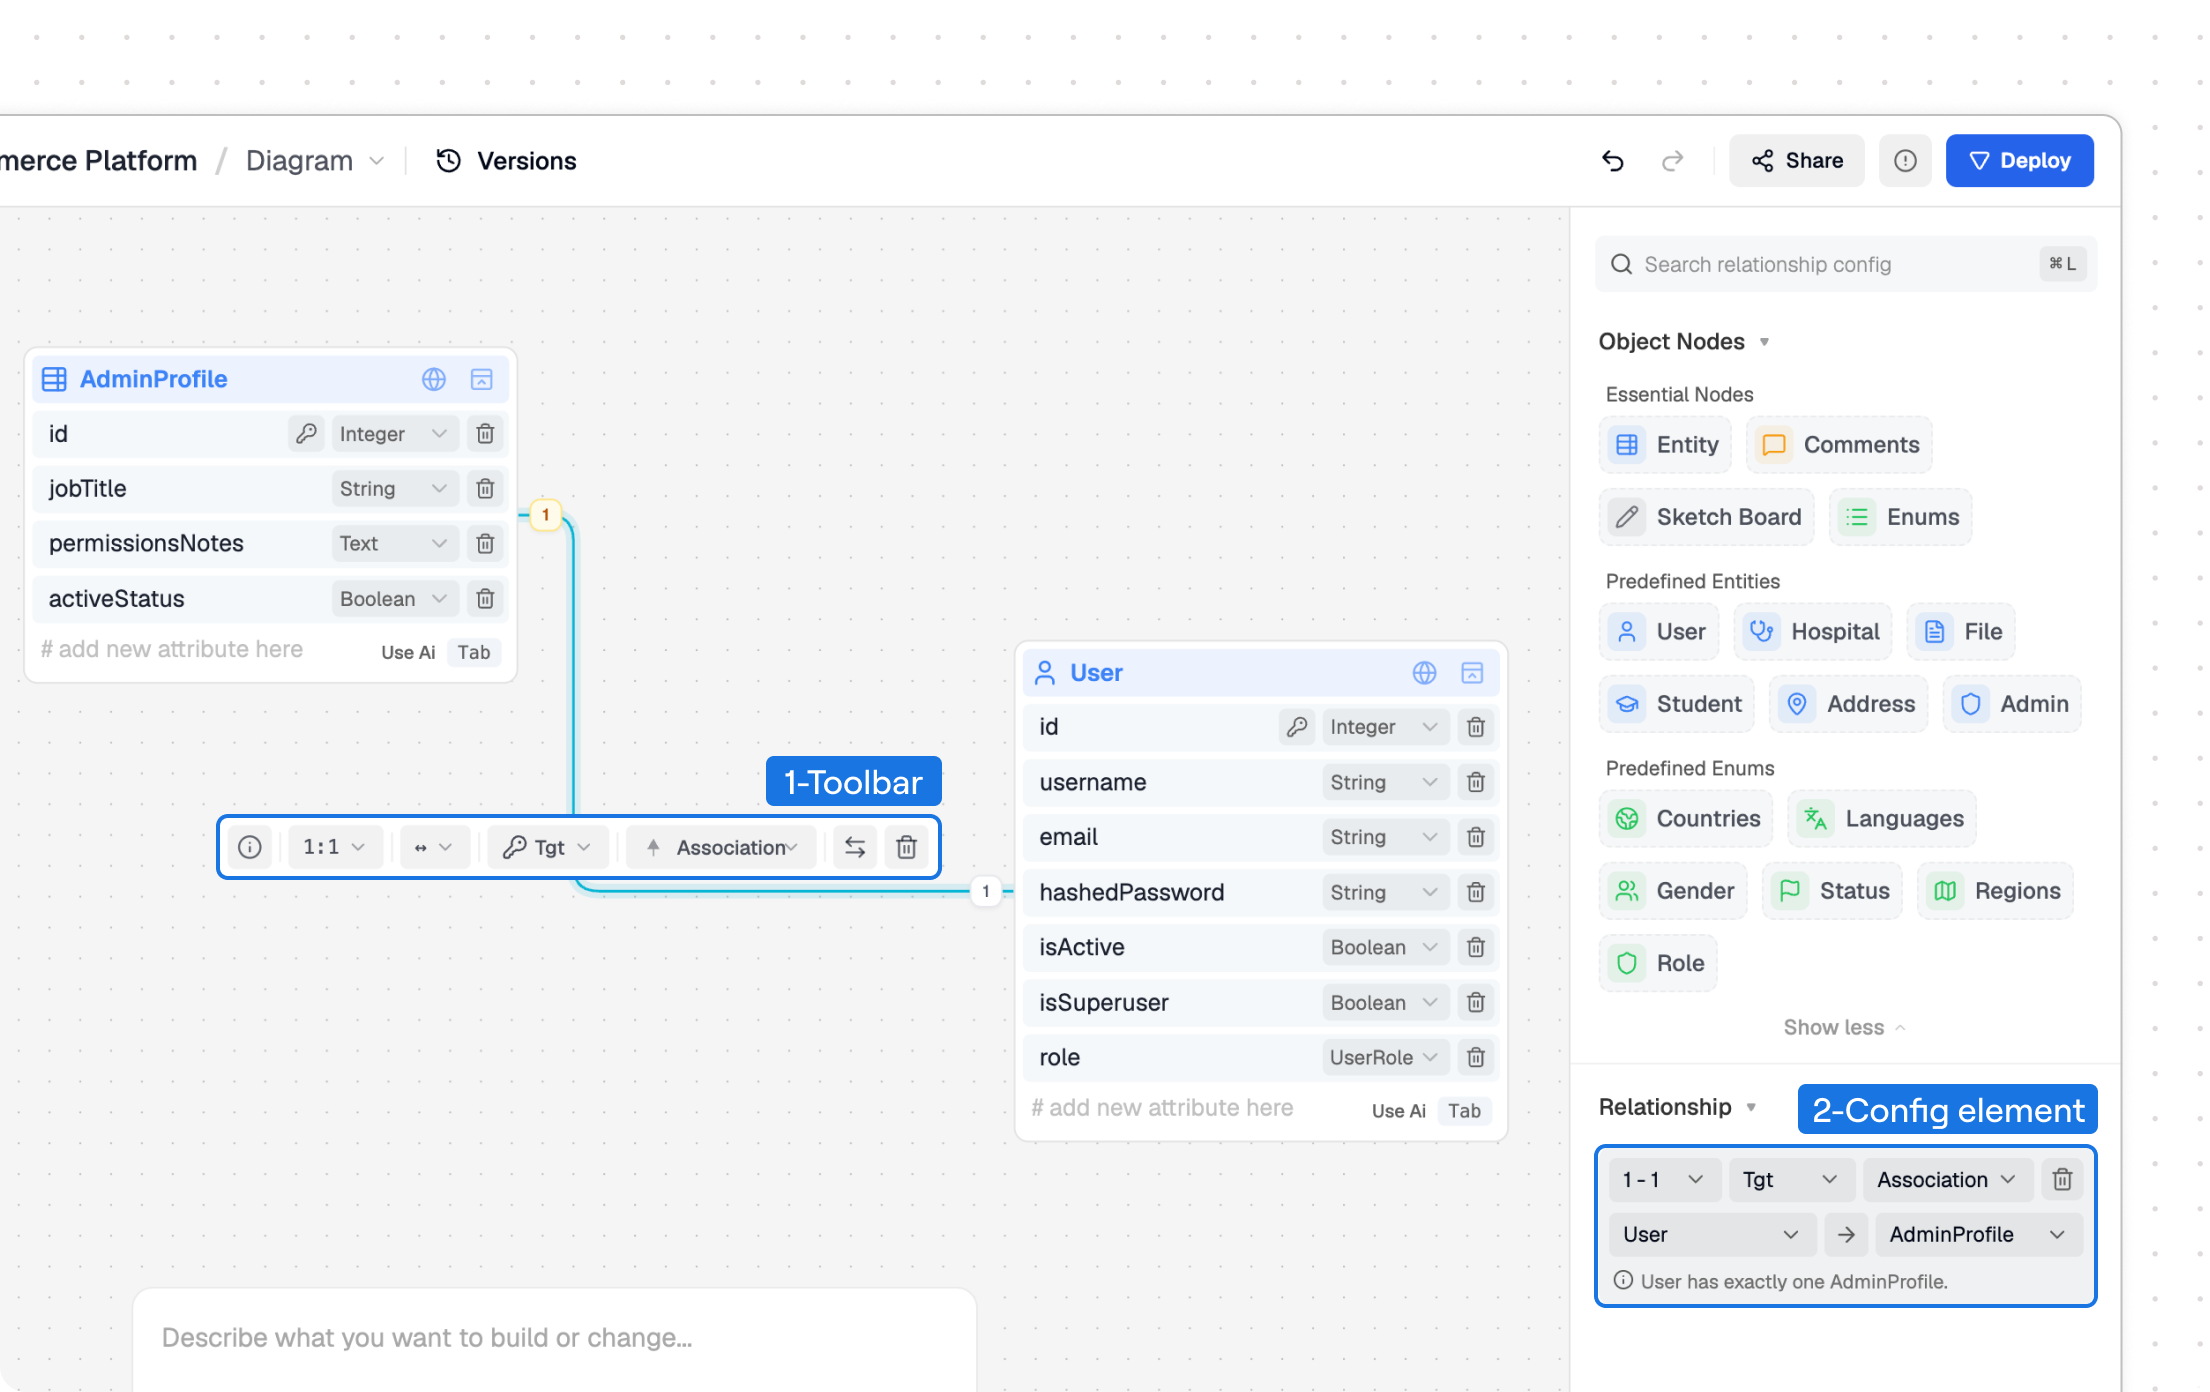
Use composition when the child belongs to the parent lifecycle and should be removed with it. Use aggregation when the related record can exist independently. Use association for a general reference. For many-to-many relationships, Avora resolves the foreign keys through a join table.
Foreign keys are managed from the relationship edge. In most cases, leave FK owner on Auto and let Avora choose the conventional side. When the owner matters, such as a one-to-one profile relationship, select the edge and set the owner from the relationship controls. The highlighted multiplicity badge on the edge shows the side that owns the foreign key; hovering it shows the generated foreign-key column name.
| Relationship shape | How Avora handles the foreign key |
|---|---|
1:* or 0:* | The target, usually the child or many side, owns the foreign key. |
*:1 | The source, usually the many side, owns the foreign key. |
1:1 or 0:1 association | Auto chooses the owner, but you can set Src or Tgt when the backend flow needs a specific side. |
*:* | A hidden join table owns both foreign keys. |
For the decision rules behind relation type, multiplicity, and foreign-key ownership, read Backend Fundamentals: Relationships.
Diagram Problems and Issues
Avora validates the diagram while you work. Nodes and edges show warning or error styling when something needs attention, and the Issues button in the top header opens the full issue list. Select an issue to jump to the affected node or relationship edge before editing it.
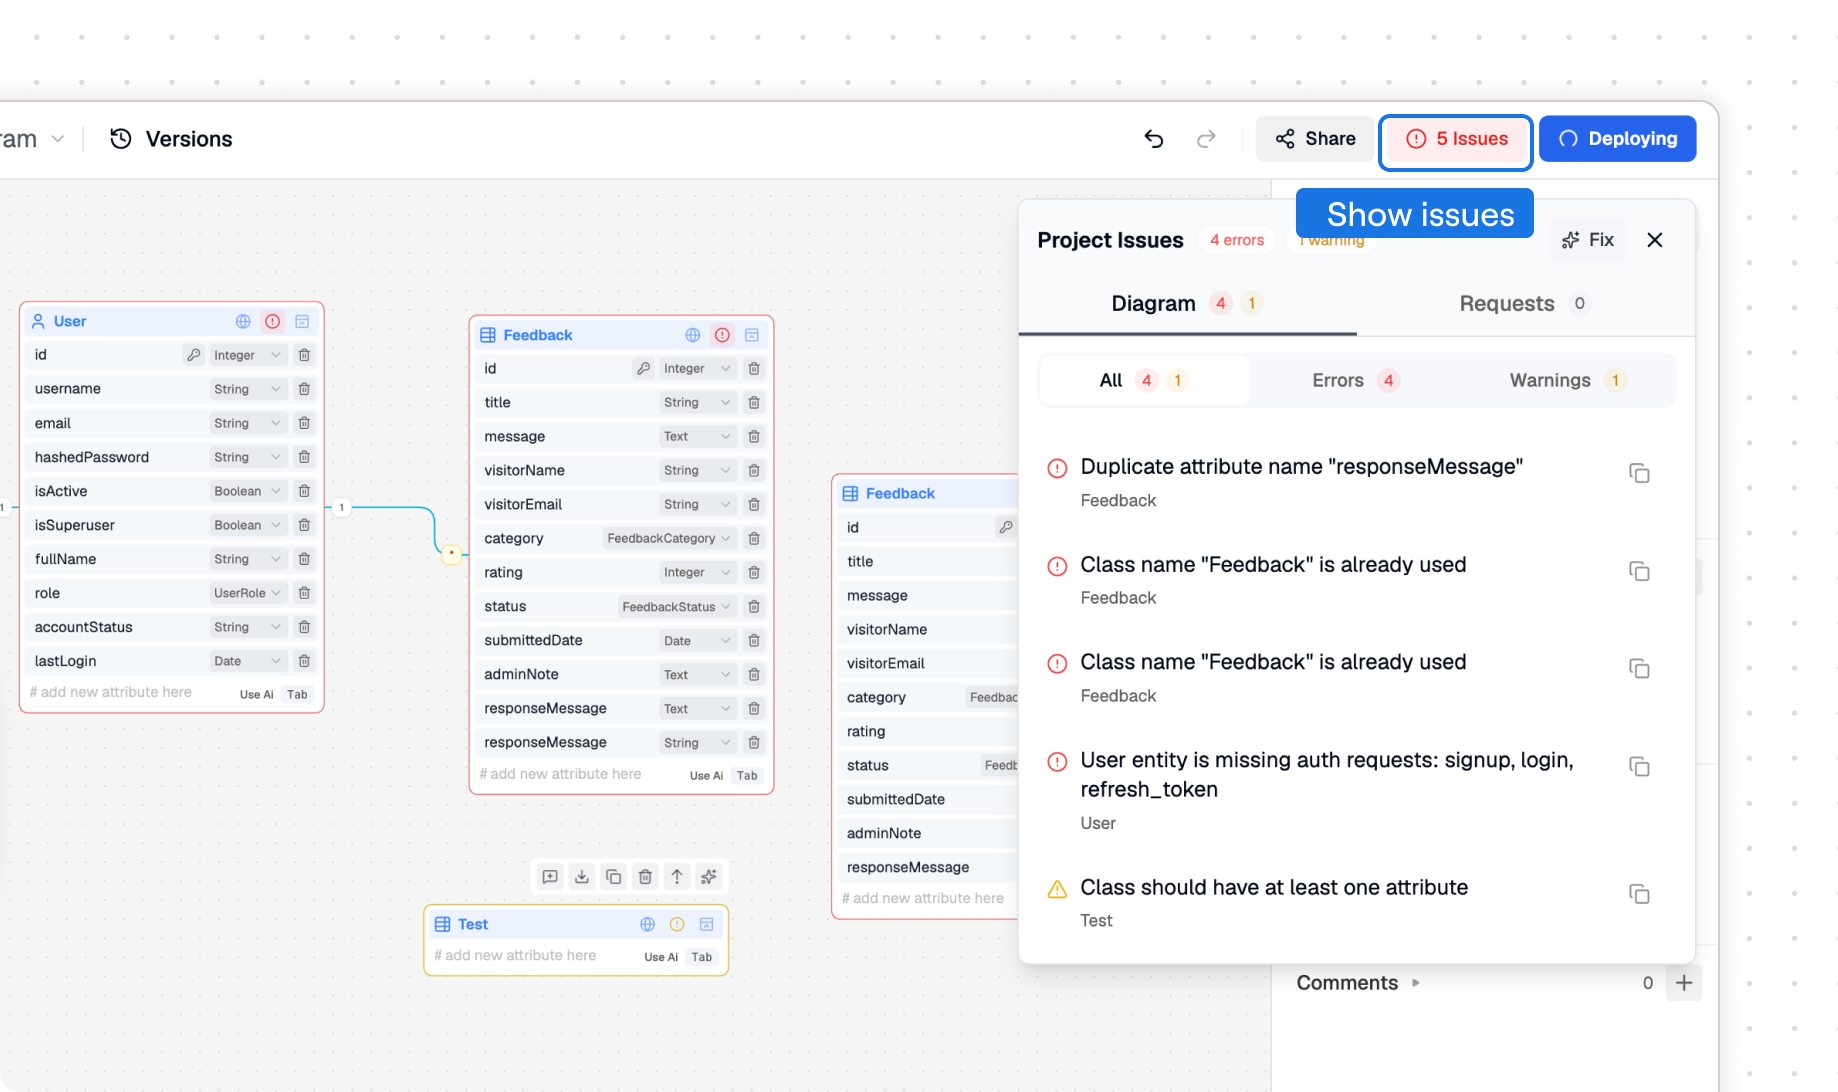
Use the issue list as a repair queue:
| Issue | What to fix |
|---|---|
| Empty entity or enum name | Rename it with a clear PascalCase name, such as UserProfile or OrderStatus. |
| Reserved keyword name | Rename any entity, enum, or attribute that uses a reserved keyword such as class, return, enum, function, or metadata. |
| Duplicate entity name | Give each entity a unique name before generating code. |
| Empty entity or enum content | Add at least one attribute to an entity and at least one value to an enum, or remove the unused node. |
| Empty or duplicate attribute name | Rename the field in camelCase and merge or remove duplicates. |
| Missing or invalid attribute type | Choose a supported primitive or enum type. Use a relationship edge instead of a manual foreign-key field when the value points to another stored entity. |
| Primary-key property conflict | Keep one primary key per entity, use a supported key type, keep it required and unique, avoid list primary keys, remove manual Index from primary keys, and use Auto Inc only on an integer primary key. |
| Circular relationship loop | Remove or reverse one ownership, inheritance, or composition edge. For softer association loops, review direction and remove an edge if the loop is not intentional. |
| Missing auth foundation | If authentication is expected, keep a valid User entity and the required auth requests. If the project should not use auth, disable that expectation in workspace settings. |
Before moving on, confirm that every entity has a valid key, every enum has at least one value, and each relationship reads correctly in the information tooltip. Then continue to Request Builder.
Example: Model a Task Tracker
For the Quick Start example, create a Task entity with this small data model:
| Field | Type and constraint | Purpose |
|---|---|---|
id | Integer primary key, auto increment | Identify each persisted task. |
title | Required string | Describe the work to complete. |
completed | Boolean | Record whether the task is finished. |
If tasks belong to users, draw a one-to-many relationship from User to Task and review its foreign-key ownership. Let the relationship define the user reference instead of adding an unrelated manual foreign-key field.
Validate the model before creating API requests. Check that the Task name is unique, exactly one field is the primary key, and a valid value is supplied for completed when a task is created. Then use the Task type in your API request inputs and outputs.