Publish, Share, and Clone Backend Logic Nodes
Use publishing when a custom logic node is ready to be reused outside the current builder session. Publishing saves the visual node configuration, framework code bundle, usage documentation, icon, color, category, and version as a node template.
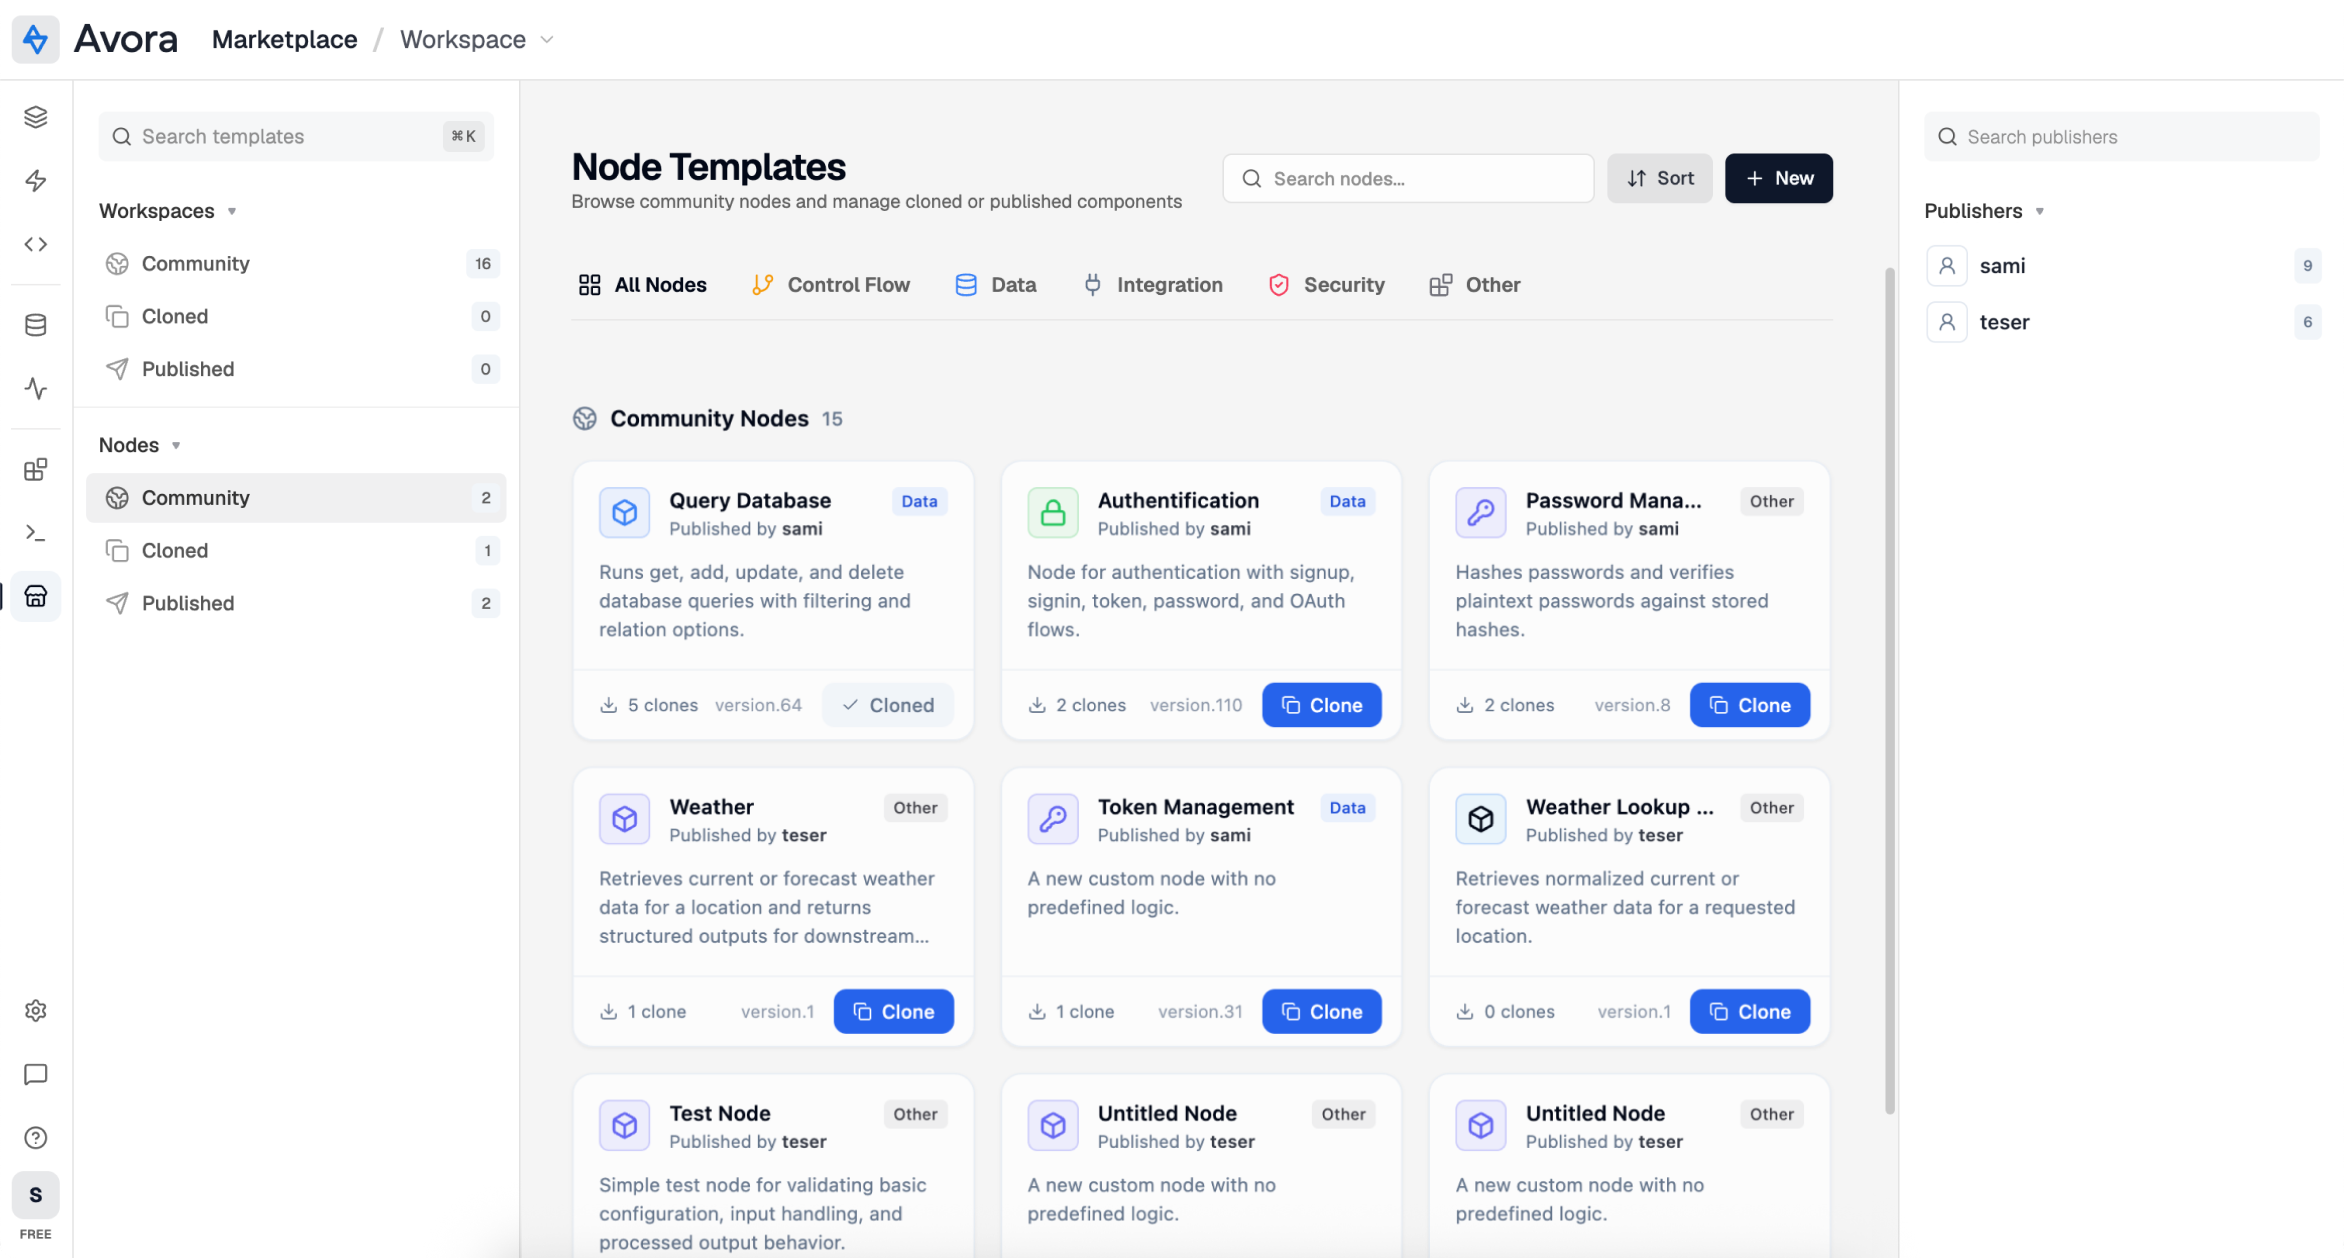
After publishing, the node can appear in the template marketplace and can be cloned into another user's available logic nodes. Updates to the original template can be pushed later, and cloners can apply those updates to their copy.
Test a Node
Test before publishing so the node contract, code tags, inputs, outputs, and error behavior can be reviewed in a realistic flow.
The Node Builder topbar includes a More actions menu for moving custom node definitions in and out of the builder.
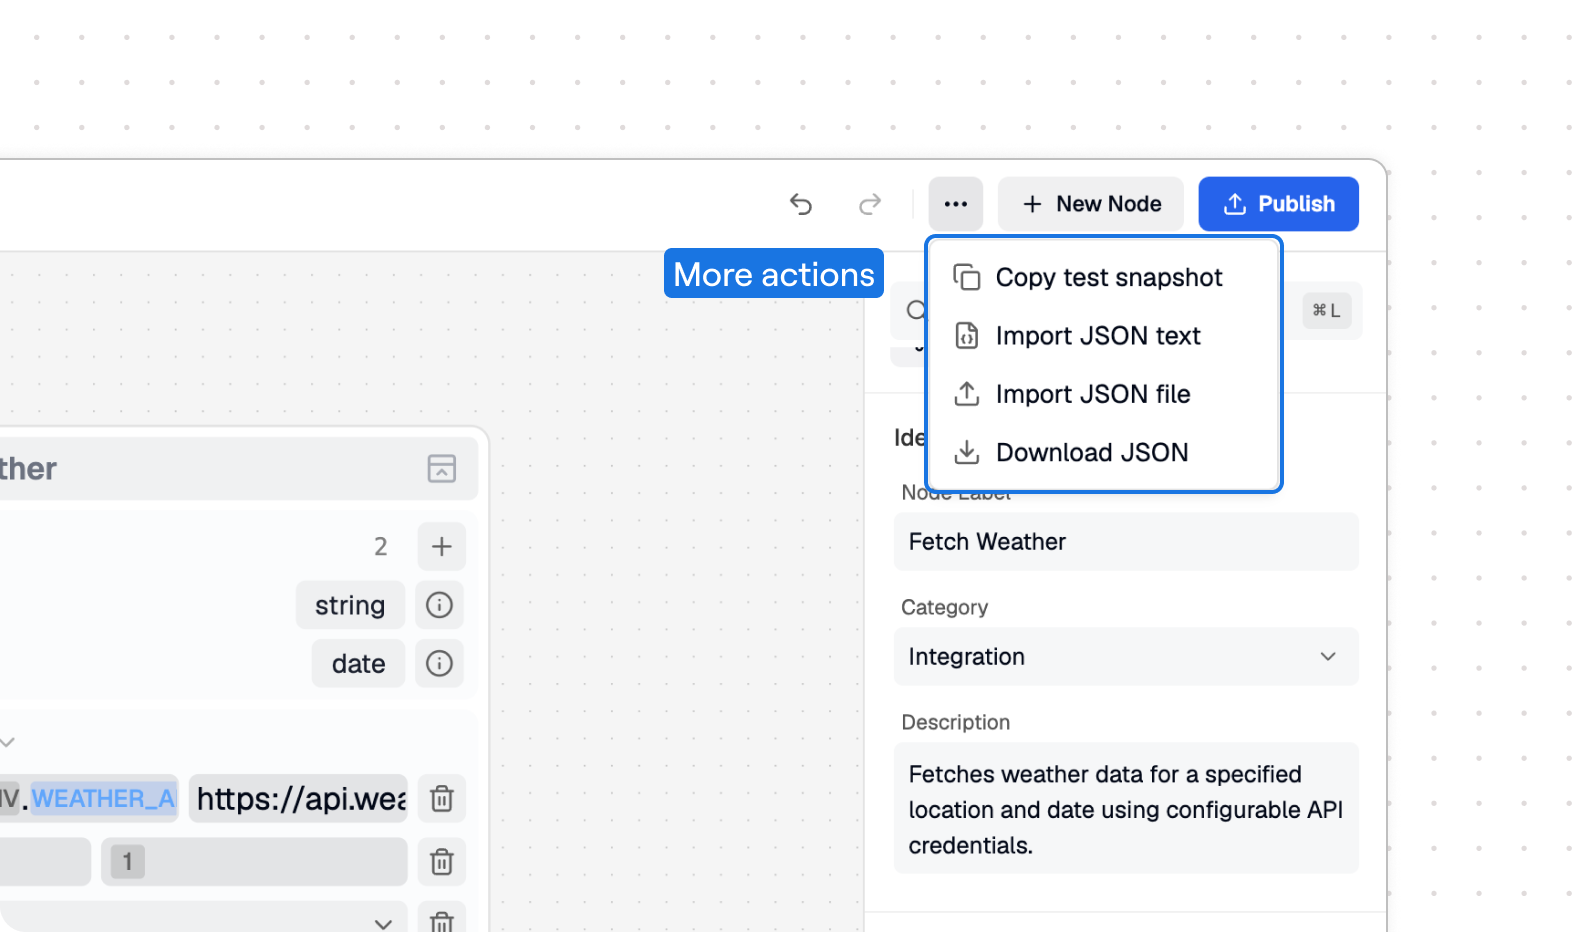
| Menu action | What it does |
|---|---|
| Copy test snapshot | Copies a compact test reference for the current node, active variant, code bundle, initial values, inputs, outputs, and errors. Paste this into the VS Code extension logic node tester. |
| Import JSON text | Opens a text box where you can paste a node configuration JSON directly into the builder. |
| Import JSON file | Opens a file picker and imports a saved node configuration JSON file. |
| Download JSON | Downloads the current visual node configuration as a JSON file for backup, review, or transfer. |
To create a test snapshot:
- Finish the visual structure for at least one variant.
- Add or generate the framework code template.
- Open the builder issue list and resolve blocking errors.
- Open More actions.
- Select Copy test snapshot.
For the rest of the local tester workflow, continue in VS Code Extension. Use the extension docs to prepare the local environment, open the Avora extension sidebar, and continue testing the copied snapshot outside the web builder.
Publish and Update
Publishing creates the reusable template. Updating changes an existing published template and marks cloned copies as having an update available.
Publish
Before publishing:
- The node label is clear.
- The description explains when to use the node.
- The category, icon, and color are set.
- Each variant has the required lines, fields, inputs, outputs, flows, and errors.
- Supported framework templates have been reviewed.
- Builder validation has no blocking errors.
- Usage markdown is accurate enough for another user to understand the node.
To publish:
- Open Node Builder or Code Builder.
- Select Publish in the topbar.
- Review the publish dialog.
- Confirm the publishing name and marketplace description.
- Select Confirm & Publish.
Result: Avora saves the node as a published template. The builder switches into published-template context so future changes can update the same template.
Update
Use Update when you are editing an already published template.
- Open the published template in Node Builder or Code Builder.
- Make the visual or code changes.
- Resolve builder issues.
- Select Update in the topbar.
- Confirm that cloners should receive an available update.
Result: Avora increments the template version and marks existing clones as updateable.
Avoid changing output names, required inputs, or variant IDs casually after publishing. Those changes can affect flows that already use the cloned node.
Share and Clone
Published templates can be reused through cloning. A clone gives a user their own copy of the node configuration and code bundle for use in logic flows.
| Action | What happens |
|---|---|
| Publish | Creates the source template owned by the publisher. |
| Clone | Copies the published template into the user's cloned node templates. |
| Use in flow | Makes the cloned node available in the Logic Nodes sidebar. |
| Update clone | Replaces the clone with the latest published template version. |
| Delete clone | Removes the user's cloned copy without deleting the original template. |
| Delete template | Removes the publisher's original template. Existing clone behavior depends on whether the clone still has its stored config and code bundle. |
To clone a node:
- Open the marketplace or node template list.
- Find the published logic node.
- Review its description, category, and usage notes.
- Select Clone.
- Open a workspace logic flow.
- Drag the cloned node from Logic Nodes into the flow.
- Choose a variant and configure it like any built-in action node.
If a cloned template has an update available, review the publisher's changes before applying the update. Updating a clone can change available variants, fields, outputs, errors, and code behavior.
Lifecycle Checklist
Use this checklist before sharing a node broadly:
- The node solves one reusable backend action.
- The name, description, icon, color, and category make the node easy to find.
- Variants are related and intentionally ordered.
- Required config lines are truly required.
- Optional and repeatable lines keep the default node compact.
- Inputs and outputs are typed and named for downstream users.
- Logic flows and errors are explicit.
- Code tags match the current visual structure.
- Dependencies are necessary and framework-specific.
- Test snapshots cover success and expected failure paths.
- Usage markdown explains how to configure the node in a real flow.
Return to Logic Node Overview for the model, Visual Node Builder for the interface, or Code Builder for implementation details.